Sunday, November 20, 2011

Cookies!!!

I can still remember the scent of my mom's cookies luring me into the kitchen when I was a kid. Gingersnaps, chocolate chip, oatmeal raisin, peanut butter... mmm!!! I'm now a cookie freak and I blame it on my childhood. ;)

Since I launched The Cookie Jar initiative a few months ago I've had the opportunity to make A LOT of mistakes, and therefore the opportunity to learn a lot the hard way. Here are a few tips to help save you the trouble.

Even the best cookie recipe can be butchered by poor ingredients. So always use a good quality butter, fresh eggs and real vanilla. And even if the recipe doesn't call for it, after the butter, sugar and vanilla have been creamed, and just after incorporating the eggs, I always use a whip attachment for 5 - 6 minutes to create a fluffy consistency. This guarantees a nice crust and a soft, chewy center every time. Even though most recipes call for mixing dry ingredients, I usually sift everything directly in and always
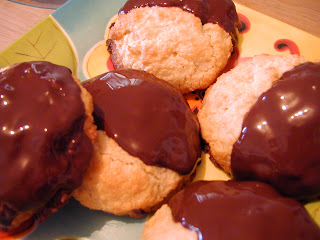
incorporate the flour last, giving it just a few turns with the mixer and then finish carefully mixing by hand. If you over mix at this point you'll end up with a dry and crumbly cookie, so be careful.

Sift everything and anything that can be sifted. A clump of baking powder is a huge turnoff.

Ever been frustrated with unevenly shaped and oddly sized cookies? You can ensure the same size every time by weighing each individual cookie ball. I shoot for 100 gram cookie balls for monster cookies, and 25 grams for minis, and always roll them into a clean round shape.

I SO WANT TO KISS THE PERSON WHO INVENTED THE SILPAT! It not only totally eradicates frustrating sticking cookie problems, but also gives a shiny finish to the underside of the cookies and keeps them from spreading too much during baking.

Oven temps and rack positions really do make a difference. Placing the rack in the upper portion of the oven helps to evenly brown desserts and keeps things from burning on the bottom. I wish I had two oven racks. If I did, I'd use them at the same time and rotate halfway through.

Get creative! Don't be afraid to rummage through the pantry, the refrigerator, and especially the garden, and experiment a bit. Pretzels and milk chocolate, dried fruit and white chocolate, dried chillies and dark chocolate, even fresh basil and lime make amazing flavor combinations. So why not put them into a cookie? If things taste good to you on their own, chances are they'll taste even better in a dessert. Herb infusions like lavender, basil, mint or lemon grass can be boiled into milk "tea" and strained, then added into mild flavored (sugar cookies, shortbread or Russian teacakes are nice neutral pallets) cookie dough for a soft hint of flavor, or you can even chop some herbs and add them directly for more punch. If the cookie you're working with absolutely can't handle added liquid, consider a flavor infused icing to top it off... like a zingy lemon peel sugar cookie with lemon grass "tea" icing, or plain shortbread with a lavender "tea" glaze, or chocolate shortbread with dried chile de arbol... or... ooooh! caramelized ginger... or....

Happy baking!


Thursday, November 17, 2011

Cake with tropical fruits and raspberry mousse

A friend of mine ordered a cake for her Independence Day dinner party and said that she envisioned lots of layers and lots of fruit. When she told me to get creative and not worry about the budget, (a baker's dream!!!) I couldn't WAIT to start planning, couldn't wait to get to the local market and start selecting colorful, scrumptious ingredients.
This cake was a basic home made yellow cake baked in 3 separate 9 in. rounds, filled with two thick layers of naturally sweet raspberry mousse. Not wanting to overpower the sweetness of the fruit with too much unnecessary sugar, I was careful to reduce the sugar in the cake by 25% and omit it entirely in the mousse. It was generously topped with a cream cheese frosting. The body of the frosting came from whipping the cream cheese and butter well and keeping it well chilled, not from overdoing the powdered sugar. The cake was finished off with, well, fruit. Lots and lots of fresh fruits selected that morning from the local market. The pomegranate came from our tree. This cake was a huge hit, and so much fun to make.

Truffles!!!


There's nothing more decadent than rich and creamy chocolate truffles, especially when you throw some unlikely flavor infusions into the mix. Andrew Garrison Shotts book Making Artisan Chocolates (GREAT BOOK! Thanks mom!!) has had me drooling and dreaming for months. Good chocolate is hard to come by here in this part of Mexico, and when my bakery supply shop got a new shipment in of Turin semi and Callebaut milk chocolate (MMMMM!!!!!) I took it as a sign from the universe, and basically spent 3 days making hundreds of truffles, which sold out in a heartbeat. From Andrew's book (...I wonder if he minds me using his first name?...), I made the gingerbread truffles, which I decided to drizzle in white chocolate and rename pumpkin spice truffles because it really brought on a pumpkin pie kind of nostalgic moment. The recipe called for toasted ground rice krispies for the coating, which we don't have here but the chocolate equivalent worked fine. Next time I might try a corn flake / choco krispy blend to cut down on the sweetness factor without compensating texture. The peanut caramel crunch truffle (Peanut Butter Sizzle, p 102) is also to die for, if you like peanut butter. It finally gave me an opportunity to use some of this gorgeous cocoa butter that's been staring back at me every time I open the fridge, and they tasted like very fancy, very expensive peanut butter cups. I decided to reserve some large chunks of caramel for garnish and only partly coat the tops with the ground peanuts.

What's better than chocolate? Hot n spicy chocolate!!! We are in Mexico, after all. One of my customer all time favorites is my hot n spicy dark truffle... basically the dark truffle recipe from the book with chopped up chile de arbol added to the ganache filling. A word of warning, these babies can be pretty hot! A little spice goes a loooooong way, especially if you forget to remove the seeds and veins.... that reminds me of a really funny story...

Now for a word on tempering (don't worry, I had to google it, too). Even though it seems like a lot of extra hassle, I've discovered that tempering the chocolate before coating the truffle centers makes all the difference in the world. You end up with a crispy, snappy, smooth and shiny chocolate that resists temperature changes and really encases the soft centers nicely. Though there's a ton available on the market, you don't really need any fancy expensive equipment for this. I use a rustic double boiler and thermometer and it works fine. Next time I'll go to the trouble of coating the plain truffles before rolling them in cocoa. They were the only ones that became chocolate puddles in a box mid-delivery while I was stuck in one of our many adventurous road blocks in 90 degree weather. The others held up fantastically, so now I'm a believer!